
How to make your iPhone read books/articles aloud to you?

In this post, I will mention one of the greatest but less used feature of iPhone...
Do you know that your phone is able to speak? I think most of you know that it is so.
But I am not talking about Siri...

What I am talking about is "Speech" feature of iPhone.

By activating this feature, you would be able to make your phone read articles and books aloud to you while driving to home/work/school or while cooking etc. In this way, you will no more need to buy Audio books if you have any non-Audio one. You can transforms your e-books or e-sources into Audio books or Audio sources. Or instead of listening radio while driving, you can listen some articles that you bookmarked or added to reading list but do not have chance to read it.


This feature is OFF by default in iOS. You should activate it before using.

Here is how you can activate and use this feature...

1- Tap on "Settings" app.


2- Tap on "General"


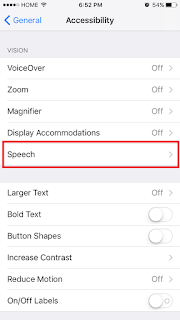
3- Tap on "Accessibility"


4- Tap on "Speech"


5- Activate "Speak Selection" switch.


========================================================================


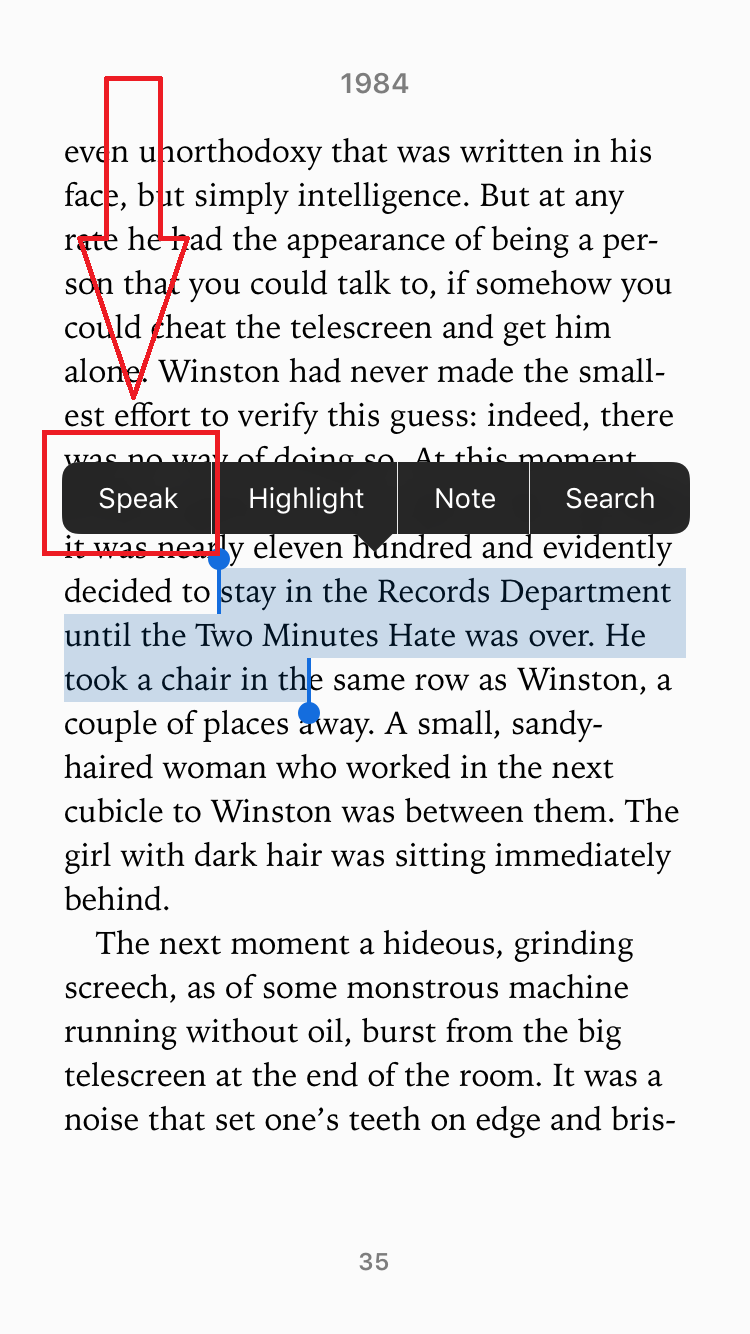
If you select any text before activating  Speak Selection Switch, you will see following available options: Copy, Look Up, Spell, Share... except Speak


After activating Speak Selection Switch, you will see the option "Speak". Tap on "Speak" option and let your phone read a book or article for you.


One More Great Feature: Speak Screen


If you activate this switch, you can hear the content of the screen by just swiping down your two fingers from the top of the screen.


After you swipe down your two fingers on the screen, a speak screen appears and content of the page is read aloud by your phone. Unless you stop the speech, whole book can be read aloud to you. You can use buttons on Speak Screen to control speech speed (turtle and rabbit buttons) or Pause/Play.

Note: This feature is tested on iOS 10.3.1


Comments

Popular posts from this blog

Mobile App Review: Amnesty SOS

A. INTRODUCTION In this post, I will review Amnesty International's mobile app for you on both Android and iOS platforms. Amnesty International has already been doing its own part for years successfully to: Stop violation of human rights  Protect people and communities who are in immediate danger Now it is your turn to do your part and  Join this great community by taking actions for human rights Speak out for people facing with unlawful, inhumane treatment Encourage friends and family to raise their voices for human rights Collect more signatures and amplify your impact  Share on social media Figure : Amnesty SOS App on Google Play Store Figure : Amnesty SOS App on iOS App Store Android App details are as follows: Version : 1.1 Released on : Feb 20, 2018 Developer e-mail : digitalcomms@amnesty.ca iOS App details are as follows: Version : 1.1.1 Released on : April 2017 Developer e-mail : digitalcomms@amnesty.ca B. ...

How to Record Screen of Your iPhone or Mac freely and easily?

There are a lot of fake apps on Appstore that you might waste your money just to record your screen. You give money buy you get nothing but a garbage. Although there are bunch of methods to record your screen, I will mention in this post the method which uses QuickTime Player. Here is how to record your screen: 1- Install QuickTime player (if you have not already) Download QuickTime player on your Mac. Use this  link  : If you have any trouble with installing QuickTime, have a look at  here for support : 2- Open QuickTime player. After you have installed QuickTime, you most probably find it in " Launchpad -> Other ". Or simply you can search it inside your Mac. 3- Connect your iPhone to your Mac with a lightning cable. To record screen of iPhone:  4- Click on "File -> New Movie Recording" 5- Click on the down arrow and select your connected iPhone. 6- Now your phone's screen is being displayed. You can st...

How to change Country/Region of App Store in iOS 10.0.2 on iPhone?

When you moved to any country other than your original country, you need to change the region/country settings of your iPhone/iPad so that you are able to download the apps specifically published for that country/region. 1- Open Settings App. 2- Tap on “iTunes & App Store”. 3- Tap on Apple ID: 4- Tap on “ View Apple ID ”. 5- Then sign in into your iTunes store either with your AppleID/Password or Touch ID . 6- Then, your iTunes account is opened as follows… Tap on " Country/Region" 7- Tap on “ Change Country or Region ”. 8- Select your current country or region from the list. 9- Then tap on “ Agree ” to agree with the Apple Media Services Terms and Conditions. 10- Tap again on “ Agree ” on the pop-up. 11- Now, Billing information on your account is displayed. Insert 3-digit security code at back of your credit card and tap on “ Next ” again. ...